|
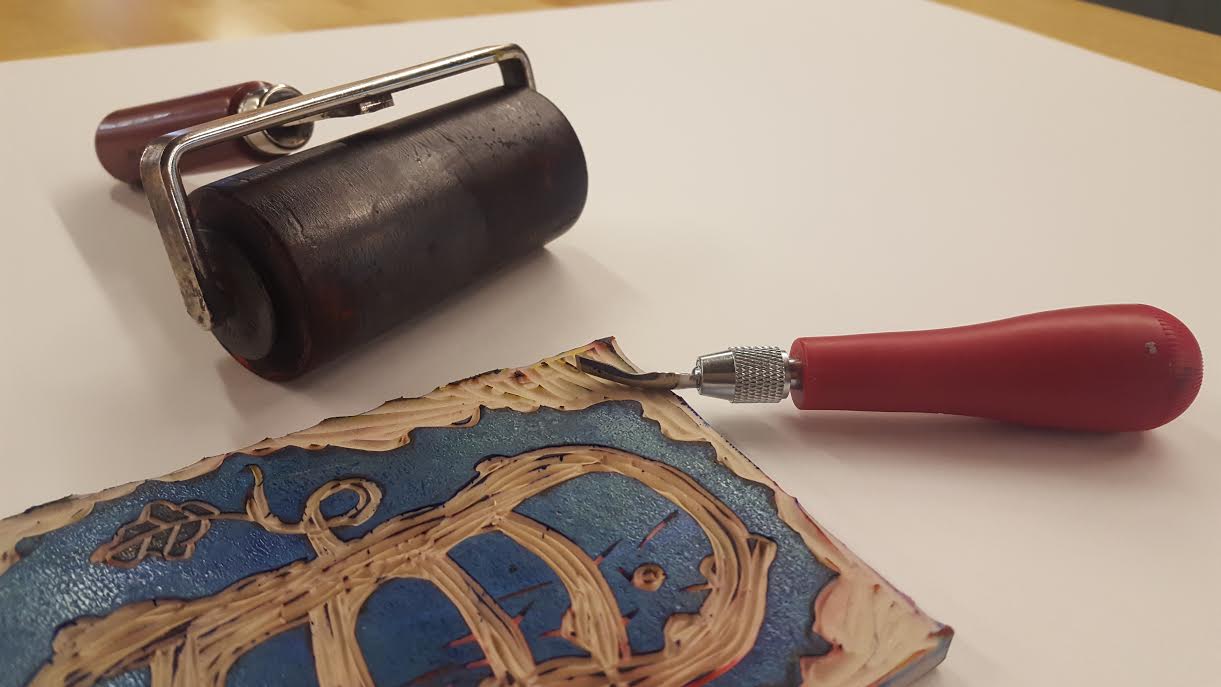
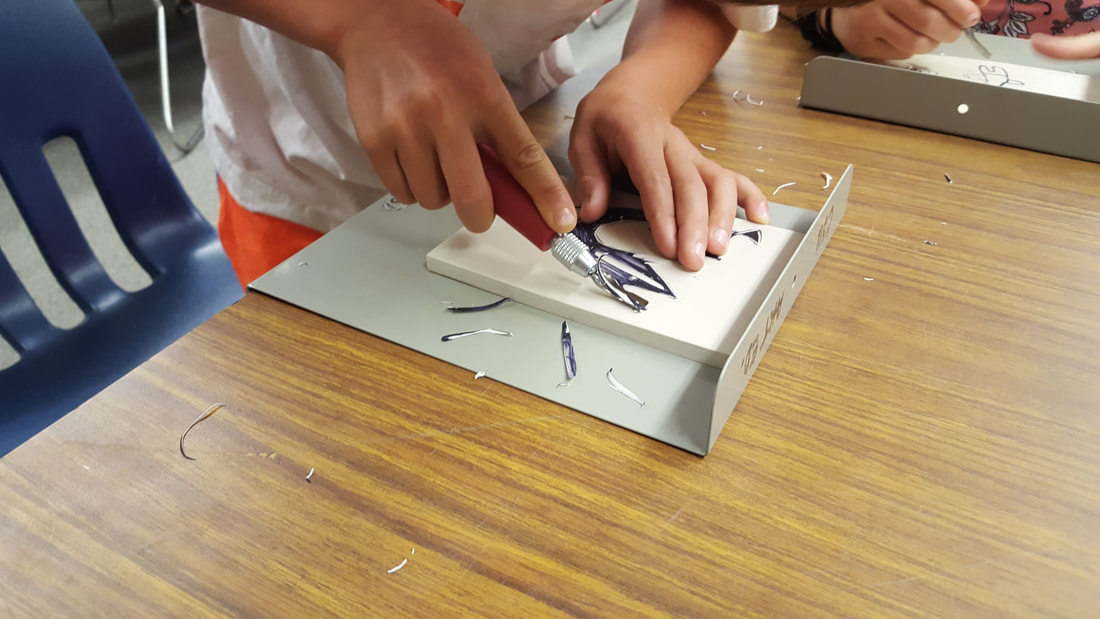
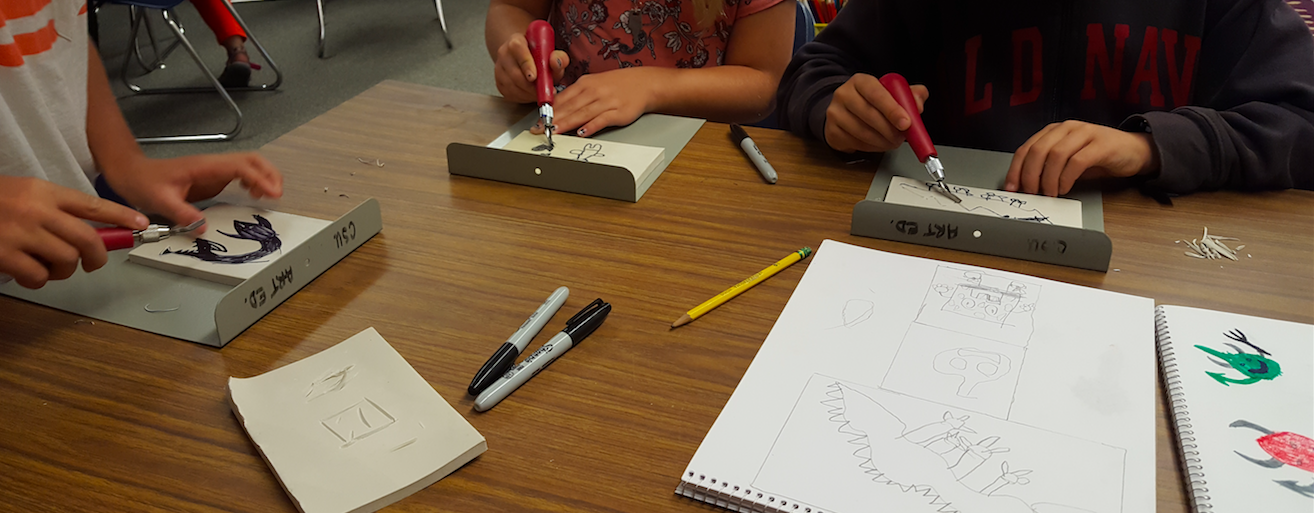
In todays lesson, the students will learn how to transfer designs from their sketchbook to their stamp and how to safely use cutting tools to carve their design into the stamp. For safety reasons, students will carve in groups of four in a workshop station setting. Meanwhile, other students will continue refining their thumbnail sketches for their final stamp.
|
|
|
Essential Understandings
Artists use symbols and stylistic choices to express their identity. Artists practice and combine different materials in their sketchbook to take creative risks for their final project. |
Learning Target
Students will transfer their design from their sketchbook to the rubber stamp and safely use cutting tools to carve out their design. " I can redraw an image from my sketchbook and can safely use cutting tools on rubber stamps." |
|
Art Focus
Students will know:
Literacy Focus
DAY 2 |
Skills
Key Concepts
|
Emily and Nicole's Class
The class started with Emily and Nicole reviewing the rules of good studio habits with the class (list what they are). Since this was the third time students had a reminder of what the rules were, they were able to raise their hands and talk about them without Emily having to hang them on the wall (which she later did after the discussion). Afterwards, students continued to work on their thumbnail sketches. Nicole helped students problem-solve with their drawings while Emily took four students at a time to a workshop table in the back of the classroom to carve into their blocks.
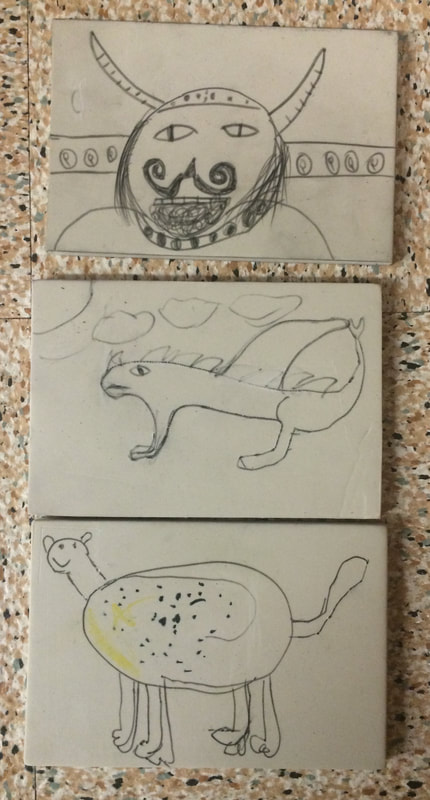
In terms of the students' thumbnail sketches, the main learning theme was understanding how to break down complicated drawings into basic shapes.
The class started with Emily and Nicole reviewing the rules of good studio habits with the class (list what they are). Since this was the third time students had a reminder of what the rules were, they were able to raise their hands and talk about them without Emily having to hang them on the wall (which she later did after the discussion). Afterwards, students continued to work on their thumbnail sketches. Nicole helped students problem-solve with their drawings while Emily took four students at a time to a workshop table in the back of the classroom to carve into their blocks.
In terms of the students' thumbnail sketches, the main learning theme was understanding how to break down complicated drawings into basic shapes.
|
"The easiest things to draw were the sandals. The hardest was the yeti body because drawing a puffy body was hard. I solved it by drawing a small body and then expanded it [made it wider]."
|
"I'm breaking the stingray into a diamond and an oval...It was hard to draw both because the oval takes up space in the diamond. I was also trying to draw a triangle and a circle for the body instead of a diamond, but the diamond was easier to draw."
|
|
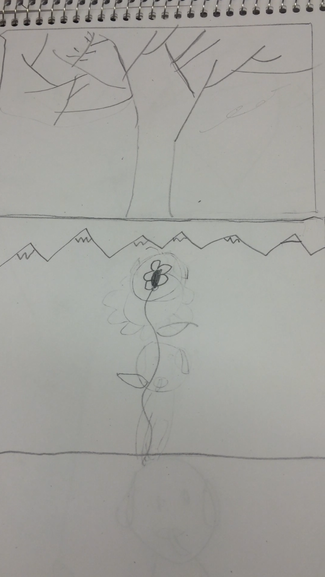
One problem-solving challenge that students worked through were including backgrounds to the "white space" around their main focal point. Another challenge was simplifying the designs of their animals, objects, and backgrounds to make sure they were not carving small or complicated details that would make them feel frustrated. While some students were okay about simplifying their designs, other students completely changed their plans to use one of their thumbnail sketches to work with another design that was simpler. One student was planning on carving out a winter tree. After realizing how difficult it would be to carve out the details for the branches and the bark, she decided to work with another thumbnail that had a mountain landscape with a flower in the middle. She felt that the design would be easier to work with, and it looked nicer. This was a decision she made without Nicole prompting her.
|
|
Since Emily has a concentration in printmaking, she decided to take students four at a time to teach them how to carve into their block. The students I worked with had to redraw their selected images on their blocks. Before they began to draw I talked with them about redrawing and how this can help us simplify and practice out drawing skills. Students did not argue and were able to simply easily. The two students with elaborate designs asked questions about how to simplify their drawings in order for them to be successful using this process and material. The other two students had simple designs and we talked about what simple details we could add to the image. The students again took the suggestions and asked process and material based questions. One student was having difficulty drawing an image of a soccer ball and complaining that his was bad and he could not draw one because he could not draw a circle. After expressing this problem right away, other students tried to help him find a solution. One student pointed out the shape stencils on the shelf and made the suggestion to use it to draw the soccer ball and the hexagons that usually pattern a soccer ball. He loved this idea and used the stencils to draw his shapes, and was very satisfied with the results. The students also helped me make suggestions for how he could add to the soccer ball drawing by adding grass at the bottom and flames coming out of the soccer ball as it is flying in the air. Before we began craving we came up with our safety rules for working with sharp tools. The students right away were able to recognize them by saying "no carving on myself or others, always carve away from me and others around me, stay in your own space." After extensive instructions students caught on to the carving process quickly, they were carving out only the parts they had colored and understood theses were the white areas and when they had a weird angle or began to carve towards themselves they would rotate the block to get a new angle without me having to instruct them. This entire experience reflected excellent problem solving skills, I was so impressed and I loved watching them as a group and individually find solutions.
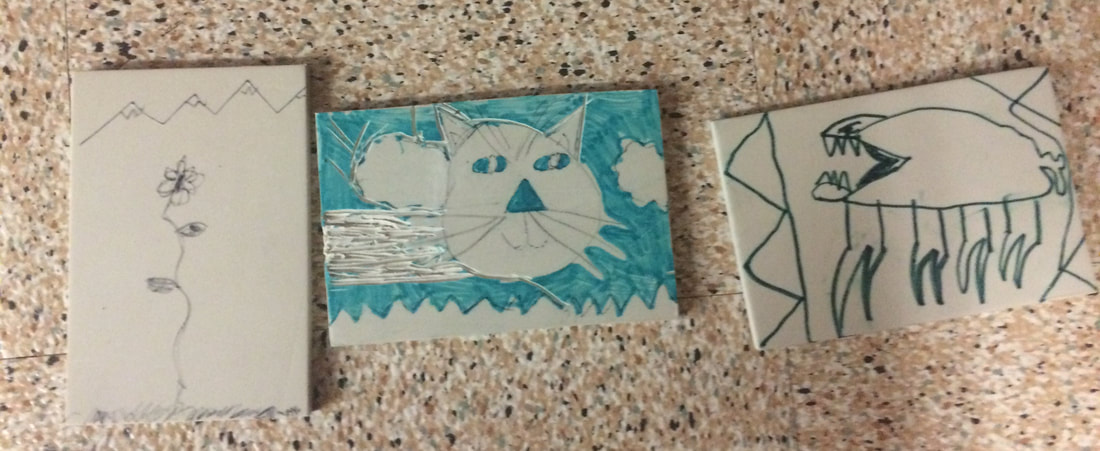
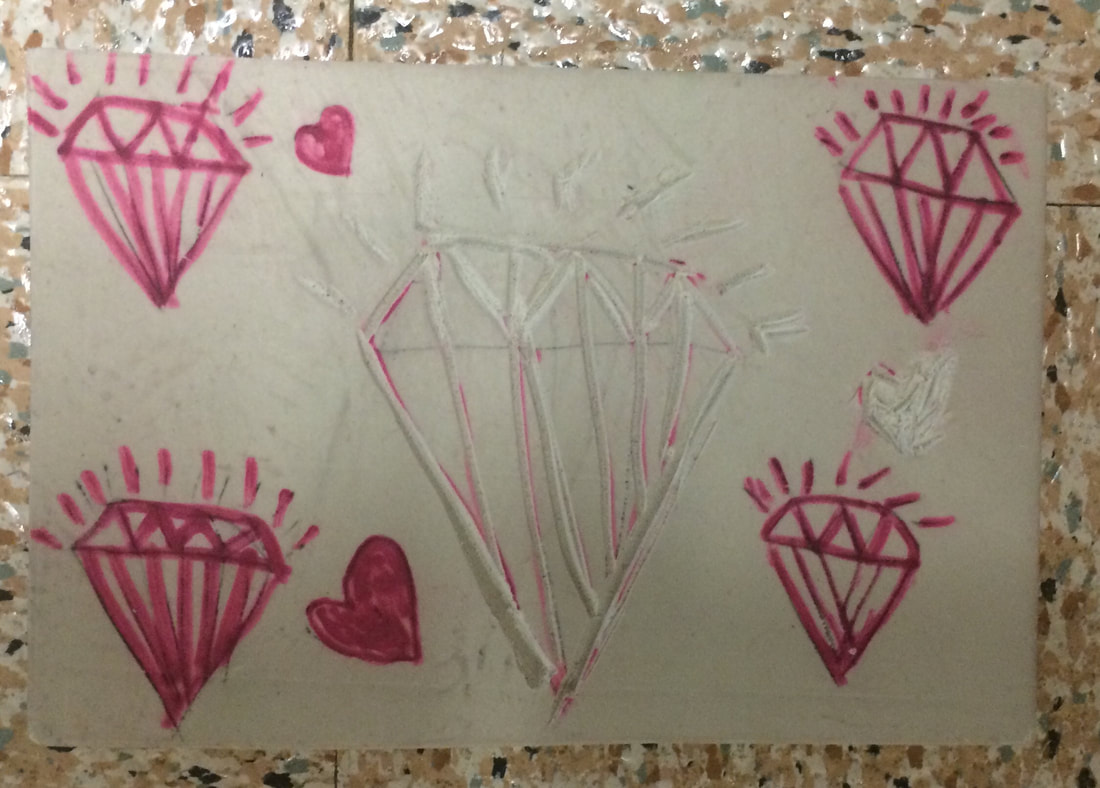
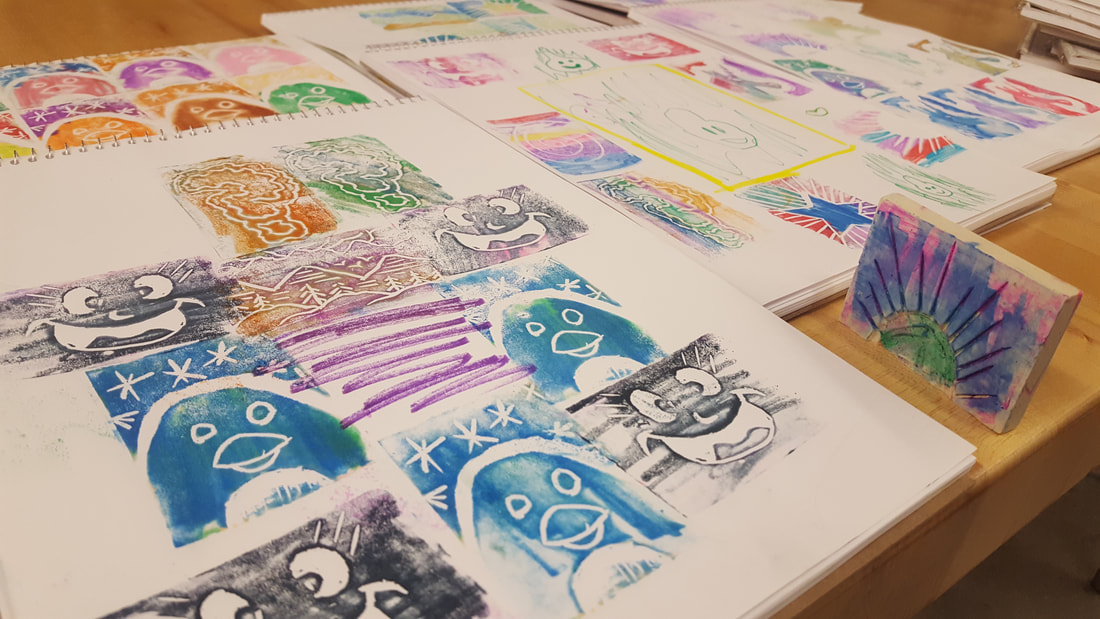
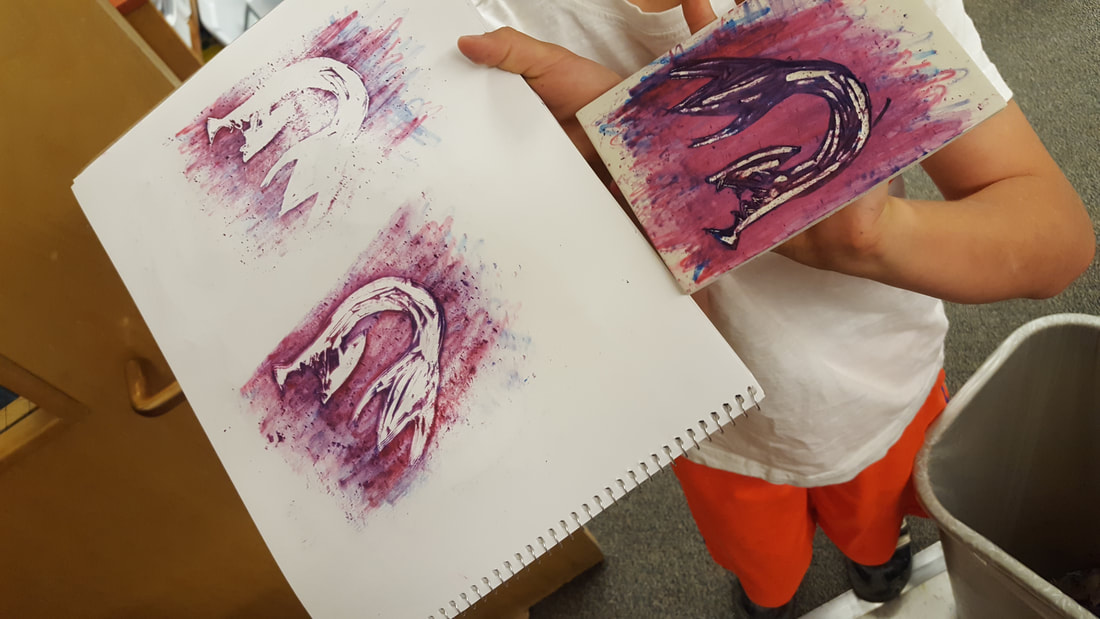
These blocks were from Emily and Nicole's class. Click on the images to see a bigger version.
Tamara's Class
Lesson One, Day Two was a day of excitement. Students were eager to try the cutting tools, to try the practice stamps, and to work on their unfinished design ideas. The boys were overall more eager to try cutting their stamps and the girls were more eager to experiment with the stamps, but this was not an absolute divide.
During the stamp cutting process, the students were surprisingly reflective on the process. One student remarked that " Art is like way easier when you draw it first." Another stated that " Cutting out the rubber was like drawing but you did it all different." When asked to explain, she stated that "You make really different moves with your hand but you get kinda the same lines and shapes."
Meanwhile, the students working with stamping had discovered repetition without direct teacher explanation. " If you put a lot of penguins together it looks like one drawing!" remarked one student as she filled out a page stamp-by-stamp. While they didn't have much initial interest in layering stamps on top of each other, they were more than eager to stamp different colors and materials next to each other to create a march of images.
Meanwhile, the students working with stamping had discovered repetition without direct teacher explanation. " If you put a lot of penguins together it looks like one drawing!" remarked one student as she filled out a page stamp-by-stamp. While they didn't have much initial interest in layering stamps on top of each other, they were more than eager to stamp different colors and materials next to each other to create a march of images.